Installing the Accutroll Throttle Control Module (TCM)
Complete installation instructions for the Accutroll Throttle Control Module (TCM).
Table of contents
- Before You Begin
- Step 1: Install Servo Bracket Motor Fitment Kit
- Step 2: Install TCM Power Connections
- Step 3: Connect Servo Motor to the TCM
- Step 4: Mount the TCM
- Step 5: Discover and add the TCM into the Accutroll App
- Step 6: Calibrate the Servo Sweep Range
- Next Step
Before You Begin
The TCM gets permanently tied into the kicker motor’s supplied power. The TCM, when not in use, parasitically draws very little power, as would your kicker motor if left connected to the battery. It is assumed that the kicker motor can be switched off using the boat’s main power switch. The TCM powers on and off along with the kicker motor.
If the kicker motor remains connected to the battery for an extended period without being turned off, the TCM has a deep sleep feature to further reduce its parasitic draw. When the battery voltage drops below a settable threshold, the TCM automatically enters deep sleep mode to protect the battery from extreme depletion. In deep sleep, the TCM draws less than 1mA. The TCM will periodically wake to check the battery voltage and will only resume normal operation once the minimum voltage level has been restored. If your TCM is unresponsive, it may be in deep sleep mode. To wake it, cycle the power off completely, then back on.
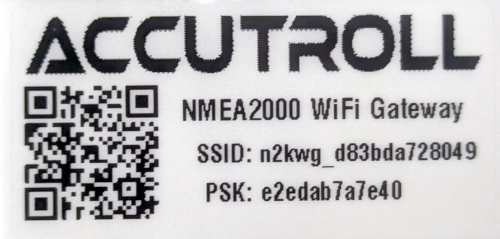
Each Accutroll device is shipped with a decal containing a QR code that encodes the device’s unique network SSID and passphrase. Do not discard this decal. Save it in your glove box or affix it somewhere convenient for future scanning. Each device has unique network parameters permanently marked on it, and the decal is a duplicate of this QR code. Since accessing the devices after installation can be inconvenient, the decals are provided so you can easily rescan the QR code if you ever need to re-add the devices to your app.
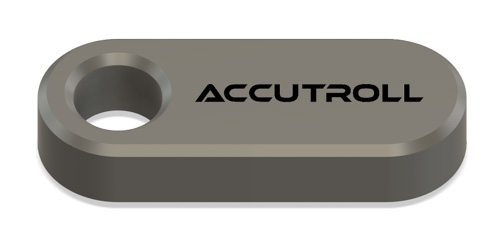
Each Accutroll device is shipped with a special keychain with an embedded magnet. It is recommended that this keychain be added to your boat’s keyring. The keychain is used to factory reset the device. Since each module is completely overmolded, factory reset can be triggered by placing the magnet near the hall effect sensor on the device. The green status LED will blink in a specific pattern indicating the reset is in process. See the troubleshooting section for each device for more specific detail.
Required:
- Accutroll app installed on your mobile device
- Boat’s main power switch in the OFF position
Install the Accutroll App
Download and install the Accutroll app from the App Store (iOS) or Google Play Store (Android).


Step 1: Install Servo Bracket Motor Fitment Kit
- Install the bracket and any other mechanical components of the motor fitment kit
Refer to the specific instructions of your particular motor fitment kit -
Mount the servo motor into the bracket with the servo horn removed
It is important to leave the servo horn removed at this point.
-
Connect the throttle cable to the motor linkage
The throttle cable (either steel cable or braid) that goes between the servo and the motor’s throttle body linkage should only be connected on the motor side at this point.
DO NOT YET CONNECT THROTTLE CABLE TO THE SERVO MOTOR
Step 2: Install TCM Power Connections
Ensure the boat’s main power switch is in the OFF position before proceeding.
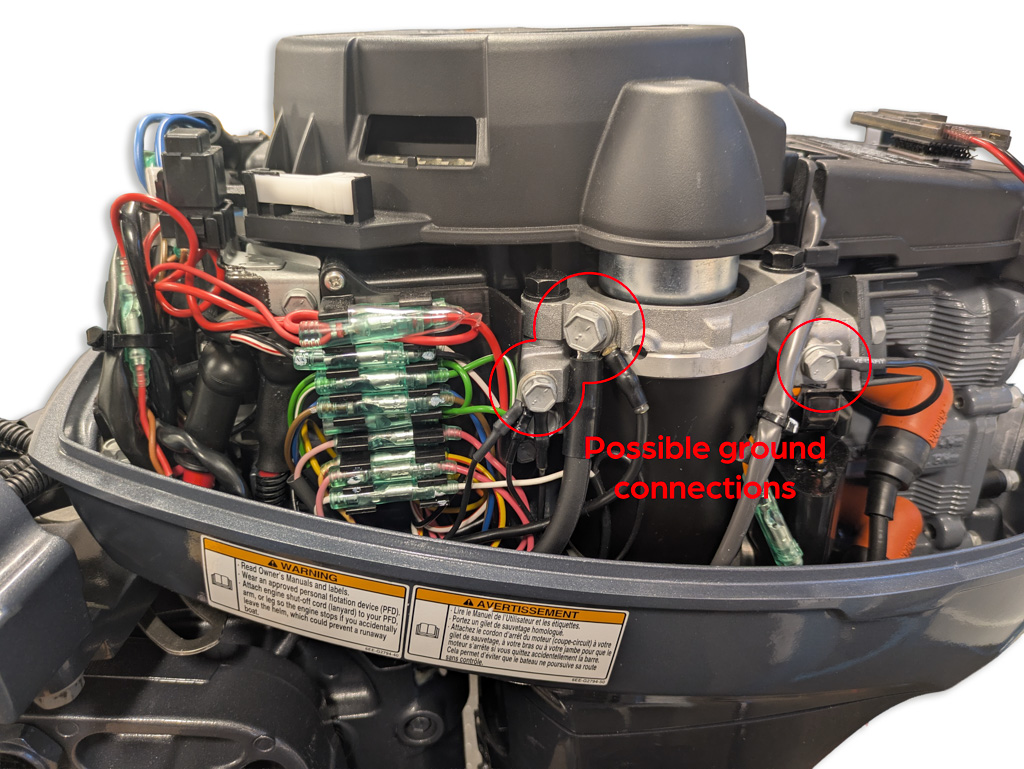
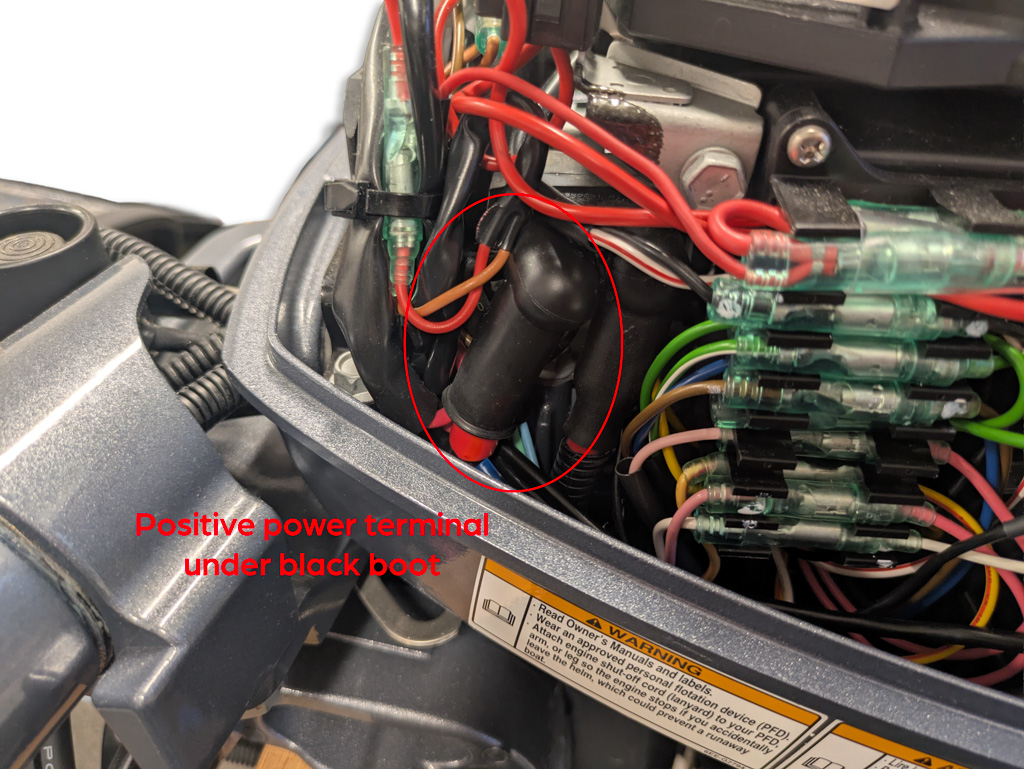
Locate the positive and negative power terminals of your kicker motor
Connect Negative Terminal
-
Connect the negative lead of the TCM power cable using the supplied ring terminal
Often there are many suitable locations to ground the TCM to the motor. It does not necessarily need to be connected directly to the negative power lead from the battery.
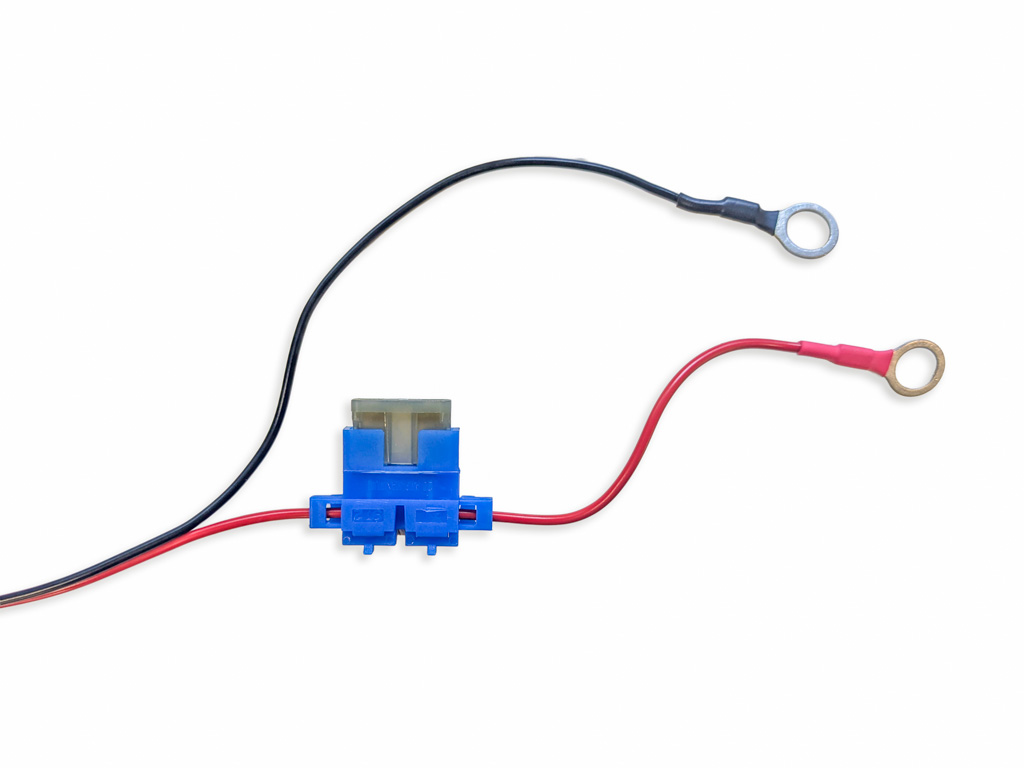
Install In-Line Fuse
-
Cut the red power lead of the TCM nearest the ring terminal, leaving sufficient length to connect to the motor’s positive power terminal
The in-line fuse should be installed as close to the TCM’s ring terminal as reasonably possible, while still leaving enough wire length between the fuse and ring terminal for easy installation when connecting to the motor’s positive battery terminal. The fuse protects the length of the TCM’s power cable between the fuse and the module itself.
- Install the in-line fuse holder between the cut ends of the power cable
- Insert the fuse into the in-line fuse holder
Connect Positive Terminal
- Connect the positive (red) lead of the TCM power cable to the motor’s positive power terminal
Step 3: Connect Servo Motor to the TCM
-
Using the supplied super-lube dielectric grease, apply a liberal amount into the two open connectors of the TCM
The dielectric grease coats the exposed contacts protecting them from corrosion
-
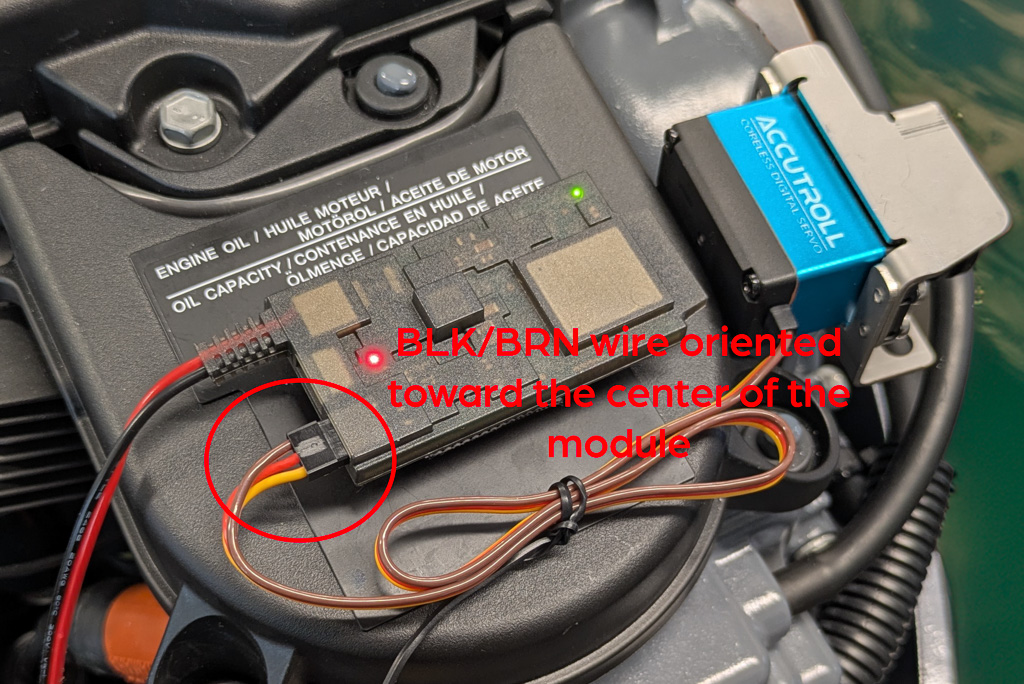
Plug the servo motor cable into the TCM
Orientation Matters: The negative lead of the servo motor (usually black or brown) should be oriented towards the center of the module. The positive lead should be oriented to the outside of the module. If the servo gets plugged in backwards by mistake, no damage will occur, but the servo motor will not move.
Step 4: Mount the TCM
Best Practice: Clean and dry surfaces thoroughly before applying the fasteners. The ALFA-LOK fasteners require a 24-hour curing time for the adhesive to reach maximum strength. While the initial set occurs relatively quickly (roughly 60 minutes), it is strongly recommended to wait a full day before attempting to separate the fasteners once pressed together. Attempting to remove the TCM too early may cause the adhesive to release from the mounting surface rather than the fastener halves separating cleanly.
- Find a convenient place to mount the TCM under the cowling
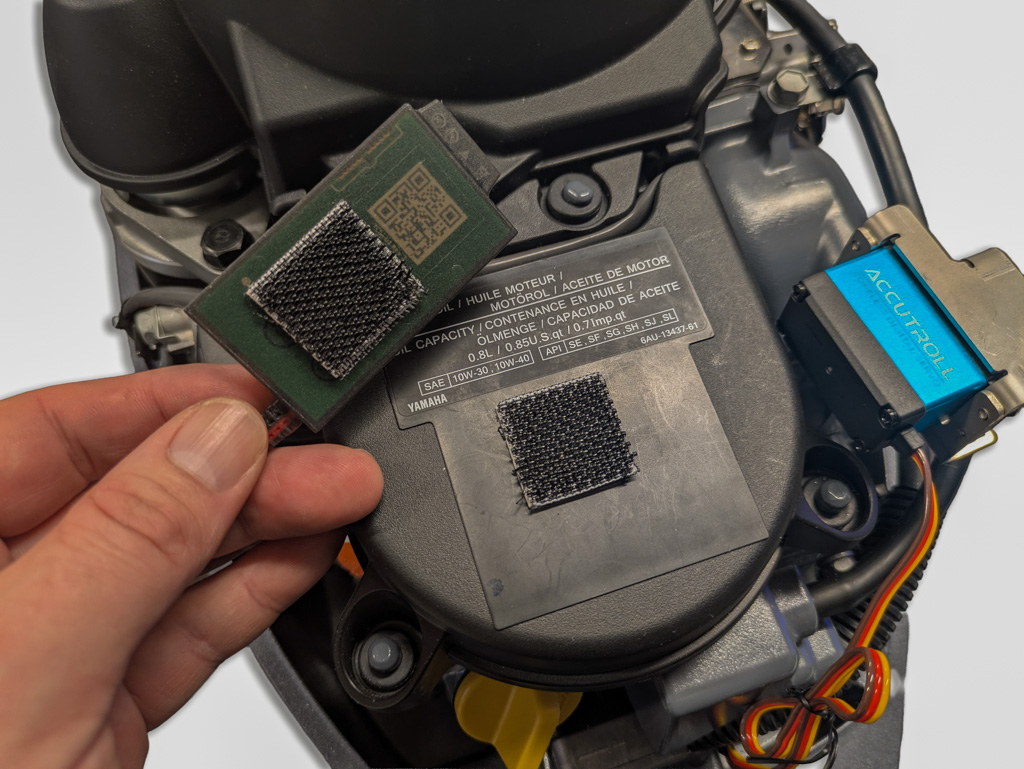
- Affix one square of the supplied heavy-duty ALFA-LOK fastener to the backside of the TCM (do not obstruct the QR code)
-
Affix the mating square to the motor body in a location you’ve determined works best
DO NOT MATE THE ALFA-LOK FASTENERS YET - You’ll need to scan the QR code on the TCM in the next step before mating the ALFA-LOK fastners. Once the fastener halves are pressed together, they should not be separated for 24 hours to ensure proper adhesive bonding.
Step 5: Discover and add the TCM into the Accutroll App
- Switch your boat’s main power switch ON to supply power to the kicker motor and TCM
- Verify the red power LED is illuminated on the TCM, indicating it is powered
-
Launch the Accutroll app on your mobile device
Accept all permission requests when prompted. Failure to do so will result in the app not working as intended.
- Using the app, scan the QR code of the TCM
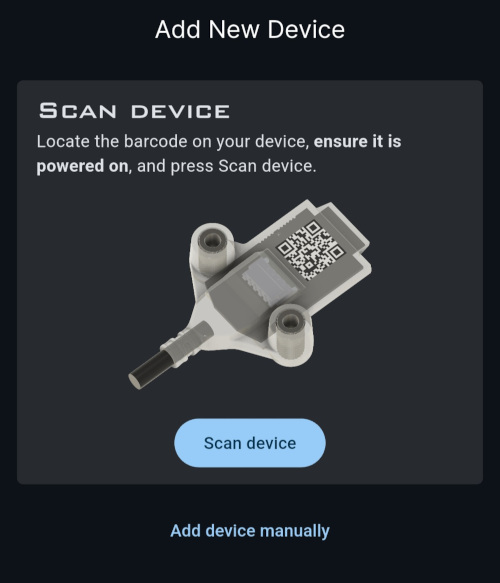
- The app will automatically connect to and discover the TCM
- Once discovered, click Save all device profiles to save the TCM to the app’s device list
If a firmware update is available for the TCM, it will be indicated by a blue badge. Click it and follow the prompts to update the firmware.

Now you can mount the TCM permanently using the ALFA-LOK fasteners.
Step 6: Calibrate the Servo Sweep Range
Launch TCM User Interface
- From the device list in the Accutroll app, tap the TCM device tile
- The app will guide you through setting up the servo parameters and sweep range
Set Servo Type and Initial Position
- With the servo horn still removed, click Next
- From the dropdown menu, select the appropriate servo motor being used and click Next
-
The controller will default to the mid position of the servo sweep range
Verify that the servo moves. Try adjusting the slider back and forth and confirm the servo shaft is moving. If it is not, the servo cable may be plugged into the TCM backwards.
- Depending on your installation, bias the initial servo position (IDLE position) to either side of the midpoint as needed
Connect Servo Horn and Set IDLE Position
- Connect the servo horn to the servo motor
- Secure the throttle cable, or braid, to the servo horn taking up as much slack as possible
-
Using the jog dial, fine-tune the IDLE position of the servo
The IDLE position should be fine tuned to take up any slack in the throttle cable, but should not be so tight that it opens the throttle body. It is safe to leave a very small amount of slack in the IDLE position to ensure the throttle is fully closed when in IDLE.
- Confirm IDLE position by clicking Next
Set FULL THROTTLE Position
-
Using the slider for coarse adjustment and the jog dial for fine adjustment, sweep the servo motor until the desired FULL THROTTLE position is reached
The full throttle position should NOT be the actual full-max throttle position of the motor. It should open the throttle body just enough to cover the max trolling speed required. The tighter the window, the more resolution the throttle controller will have between IDLE and FULL.
-
Accept the FULL throttle position and click Next
Verify Throttle Sweep Range
- Use the control interface to verify the throttle sweep range
- Increase the setpoint to 100%
- Test by using “Swipe to IDLE”, “RESUME”, and back to IDLE a couple of times to exercise the throttle actuation
If you need to adjust the IDLE or FULL throttle positions, go through the calibration process again by navigating to Settings > Calibration.
Installation Complete!
Your Accutroll Throttle Control Module is now installed and configured.
Next Step
- If you have an NMEA2000 WiFi Gateway, proceed to the Gateway Installation Guide
Need Help?
- Email Support: support@accutroll.com
- Contact Form: accutroll.com/pages/contact